안드로이드 - Kotlin login 구현 (PHP, mysql, volley)
대부분의 어플을 보면 로그인 기능이 있는데요,
이번에는 php와 mysql을 이용하여 아래의 영상같이 로그인 기능이 작동하도록 하는 방법에 대해 알아보겠습니다.
우선 로그인, 회원가입 화면을 보여줄 UI를 먼저 구성해 봅니다.
activity_login.xml
<?xml version="1.0" encoding="utf-8"?>
<androidx.constraintlayout.widget.ConstraintLayout xmlns:android="http://schemas.android.com/apk/res/android"
    xmlns:app="http://schemas.android.com/apk/res-auto"
    xmlns:tools="http://schemas.android.com/tools"
    android:layout_width="match_parent"
    android:layout_height="match_parent"
    tools:context=".login.LoginActivity">
    <EditText
        android:id="@+id/et_pass"
        android:layout_width="wrap_content"
        android:layout_height="wrap_content"
        android:layout_marginStart="8dp"
        android:layout_marginTop="8dp"
        android:layout_marginEnd="8dp"
        android:ems="10"
        android:hint="패스워드"
        android:inputType="textPersonName"
        app:layout_constraintEnd_toEndOf="parent"
        app:layout_constraintStart_toStartOf="parent"
        app:layout_constraintTop_toBottomOf="@+id/et_id" />

    <EditText
        android:id="@+id/et_id"
        android:layout_width="wrap_content"
        android:layout_height="wrap_content"
        android:layout_marginStart="8dp"
        android:layout_marginTop="300dp"
        android:layout_marginEnd="8dp"
        android:ems="10"
        android:hint="아이디"
        android:inputType="textPersonName"
        app:layout_constraintEnd_toEndOf="parent"
        app:layout_constraintStart_toStartOf="parent"
        app:layout_constraintTop_toTopOf="parent" />
    <Button
        android:id="@+id/btn_login"
        android:layout_width="0dp"
        android:layout_height="wrap_content"
        android:layout_marginTop="16dp"
        android:text="로그인"
        app:layout_constraintEnd_toEndOf="@+id/et_pass"
        app:layout_constraintHorizontal_bias="0.0"
        app:layout_constraintStart_toStartOf="@+id/et_pass"
        app:layout_constraintTop_toBottomOf="@+id/et_pass" />
    <Button
        android:id="@+id/btn_register"
        android:layout_width="0dp"
        android:layout_height="wrap_content"
        android:layout_marginTop="20dp"
        android:text="회원가입"
        app:layout_constraintEnd_toEndOf="@+id/btn_login"
        app:layout_constraintHorizontal_bias="0.0"
        app:layout_constraintStart_toStartOf="@+id/btn_login"
        app:layout_constraintTop_toBottomOf="@+id/btn_login" />
</androidx.constraintlayout.widget.ConstraintLayout>
activity_register
<?xml version="1.0" encoding="utf-8"?>
<androidx.constraintlayout.widget.ConstraintLayout xmlns:android="http://schemas.android.com/apk/res/android"
    xmlns:app="http://schemas.android.com/apk/res-auto"
    xmlns:tools="http://schemas.android.com/tools"
    android:layout_width="match_parent"
    android:layout_height="match_parent"
    tools:context=".login.RegisterActivity">

    <EditText
        android:id="@+id/et_id"
        android:layout_width="200dp"
        android:layout_height="45dp"
        android:layout_marginTop="30dp"
        android:ems="10"
        android:hint="Email"
        android:inputType="textPersonName"
        app:layout_constraintEnd_toEndOf="parent"
        app:layout_constraintStart_toStartOf="parent"
        app:layout_constraintTop_toTopOf="parent" />

    <EditText
        android:id="@+id/et_pass"
        android:layout_width="200dp"
        android:layout_height="45dp"
        android:layout_marginTop="20dp"
        android:ems="10"
        android:hint="패스워드"
        android:inputType="textPersonName"
        app:layout_constraintEnd_toEndOf="@+id/et_id"
        app:layout_constraintStart_toStartOf="@+id/et_id"
        app:layout_constraintTop_toBottomOf="@+id/et_id" />
    <EditText
        android:id="@+id/et_passck"
        android:layout_width="200dp"
        android:layout_height="45dp"
        android:layout_marginTop="20dp"
        android:ems="10"
        android:hint="패스워드 확인"
        android:inputType="textPersonName"
        app:layout_constraintEnd_toEndOf="@+id/et_pass"
        app:layout_constraintStart_toStartOf="@+id/et_pass"
        app:layout_constraintTop_toBottomOf="@+id/et_pass" />

    <EditText
        android:id="@+id/et_name"
        android:layout_width="200dp"
        android:layout_height="45dp"
        android:layout_marginTop="20dp"
        android:ems="10"
        android:hint="이름"
        android:inputType="textPersonName"
        app:layout_constraintEnd_toEndOf="@+id/et_passck"
        app:layout_constraintStart_toStartOf="@+id/et_passck"
        app:layout_constraintTop_toBottomOf="@+id/et_passck" />

    <Button
        android:id="@+id/btn_register"
        android:layout_width="200dp"
        android:layout_height="45dp"
        android:layout_marginTop="20dp"
        android:text="회원가입"
        app:layout_constraintStart_toStartOf="@+id/et_name"
        app:layout_constraintTop_toBottomOf="@+id/et_name" />

    <Button
        android:id="@+id/validateButton"
        android:layout_width="wrap_content"
        android:layout_height="45dp"
        android:layout_marginTop="28dp"
        android:text="중복확인"
        app:layout_constraintEnd_toEndOf="parent"
        app:layout_constraintHorizontal_bias="0.058"
        app:layout_constraintStart_toEndOf="@+id/et_id"
        app:layout_constraintTop_toTopOf="parent" />

</androidx.constraintlayout.widget.ConstraintLayout>
인제 인터넷 통신을 위한 Volley 라이브러리 의존성 주입과 인터넷 권한을 아래와 같이 설정해주세요
(Gradle : Module)
dependencies {
    implementation 'com.android.volley:volley:1.2.0'
}
AndroidManiFest.xml
<uses-permission android:name="android.permission.INTERNET" />
<application
    android:usesCleartextTraffic="true"
인제 아래와 같이 DB를 생성하고 PHP 파일을 연동해 줍니다.
아래 사이트에 들어가서 회원 가입을 합니다.
https://www.dothome.co.kr/index.php
닷홈 호스팅
닷홈은 도메인, 무료 웹호스팅, 웹빌더, 메일호스팅, SSL보안인증서, 서버호스팅, 코로케이션 등 다양한 호스팅 서비스를 제공하고 있습니다.
www.dothome.co.kr
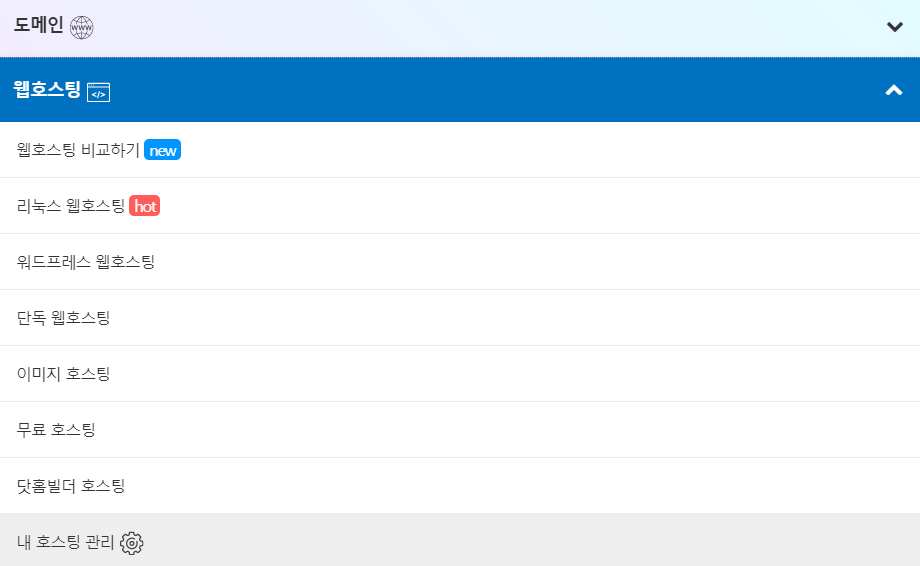
무료 호스팅으로 들어간 후 FTP아이디, 비밀번호 DB명, 아이디, 비밀번호를 입력하고 신청해줍니다.
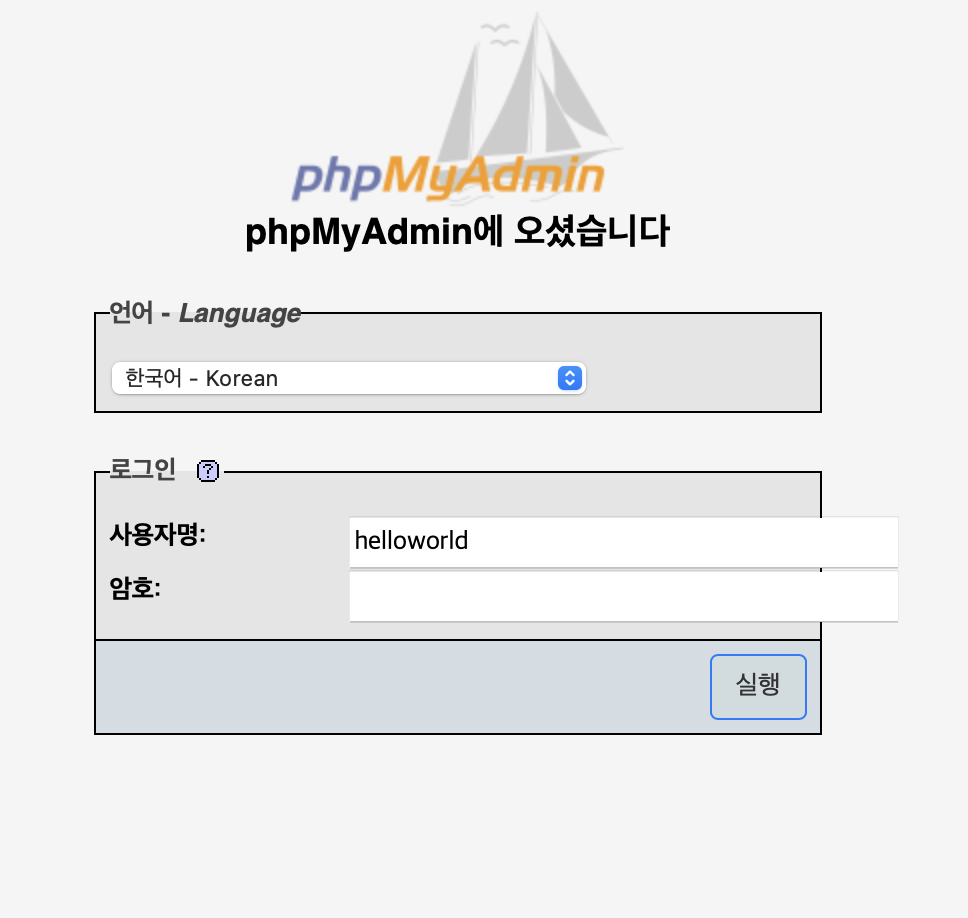
그 후 '자신의 아이디'.dothome.co.kr/myadmin으로 들어가셔서 로그인을 합니다.
ex) ID: helloworld
-> http://helloworld.dothome.co.kr/myadmin

sql탭에 들어가셔서 아래 구문을 적어 줍니다.
CREATE TABLE `USER`(
userID VARCHAR(50) NOT NULL,
userPassword VARCHAR(50) NOT NULL,
userName VARCHAR(50) NOT NULL,
PRIMARY KEY(userID)
);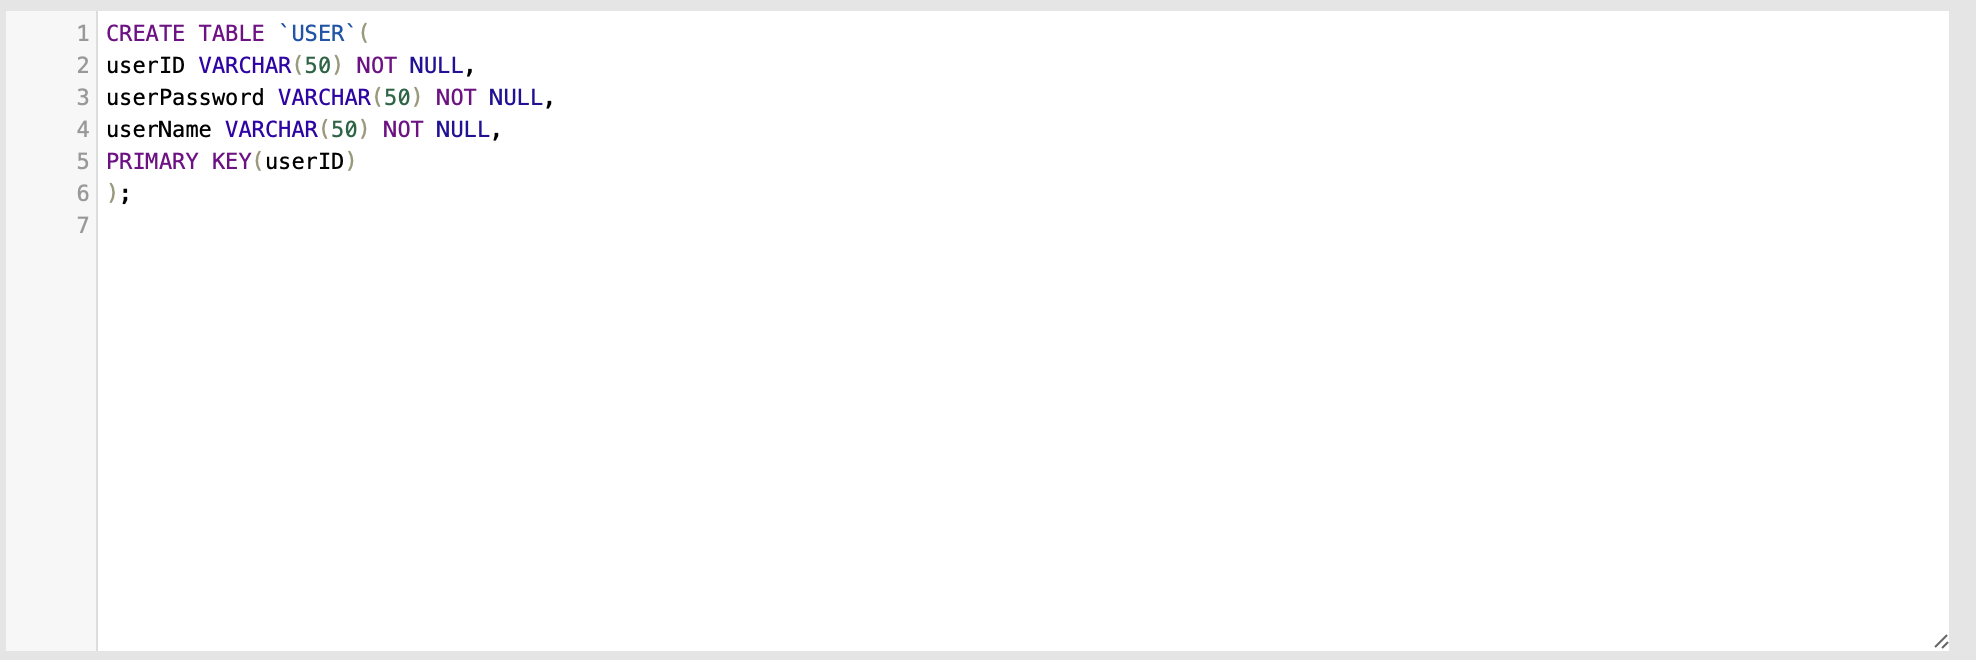

위 구문을 작성 후 아래에 있는 실행 버튼을 누르게 되면 테이블이 생성됩니다.
인제 php와 db를 연결해 주기 위해 아래 사이트에 접속해 ftp 클라이언트 프로그램을 다운로드 해줍니다.
https://filezilla-project.org/
FileZilla - The free FTP solution
Overview Welcome to the homepage of FileZilla®, the free FTP solution. The FileZilla Client not only supports FTP, but also FTP over TLS (FTPS) and SFTP. It is open source software distributed free of charge under the terms of the GNU General Public Licen
filezilla-project.org
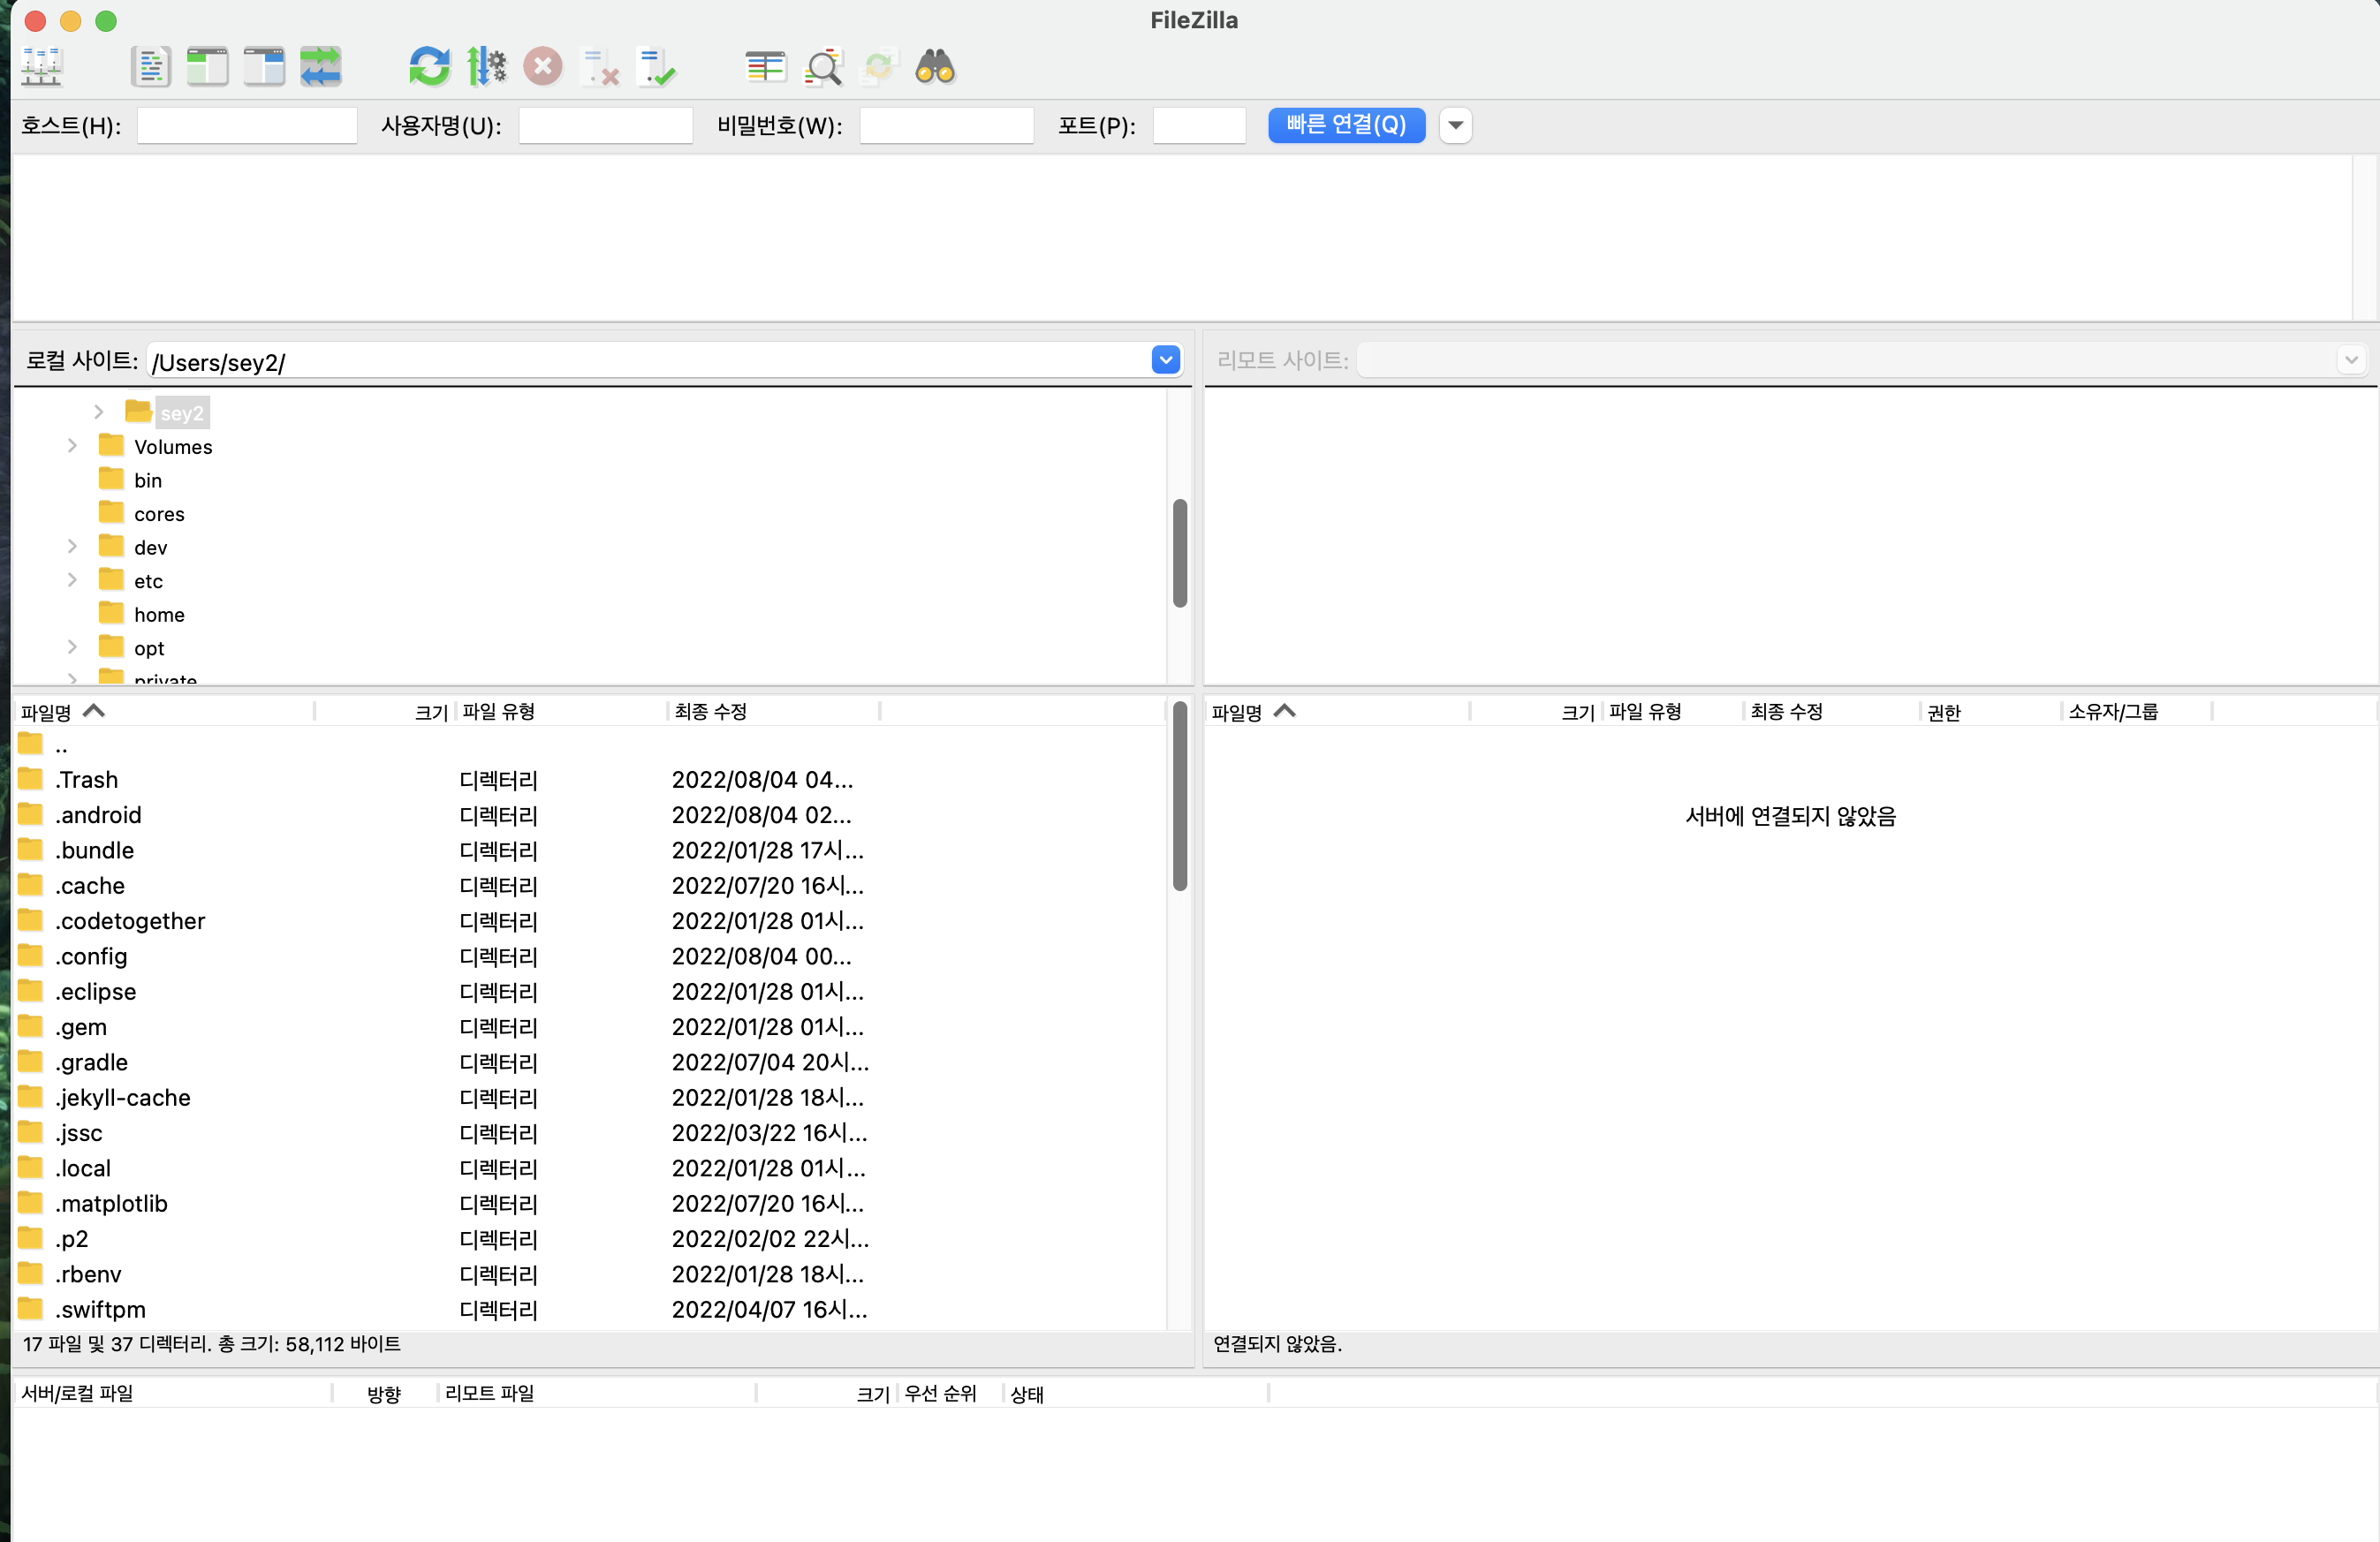
프로그램 연결을 위해서 위사진에 나와있는 호스트, 사용자명 , 비밀번호칸에 아래와 같이 입력해줍니다.
호스트 : '자신의 아이디'. dothome.co.kr
사용자명 : 자신의 아이디
비밀번호 : 자신의 비밀번호
포트 : 21
입력해주고 연결을 누르고 접속 해줍니다
html 폴더에 Login.php, Register.php, UserValidate.php 파일을 넣어 줍시다.
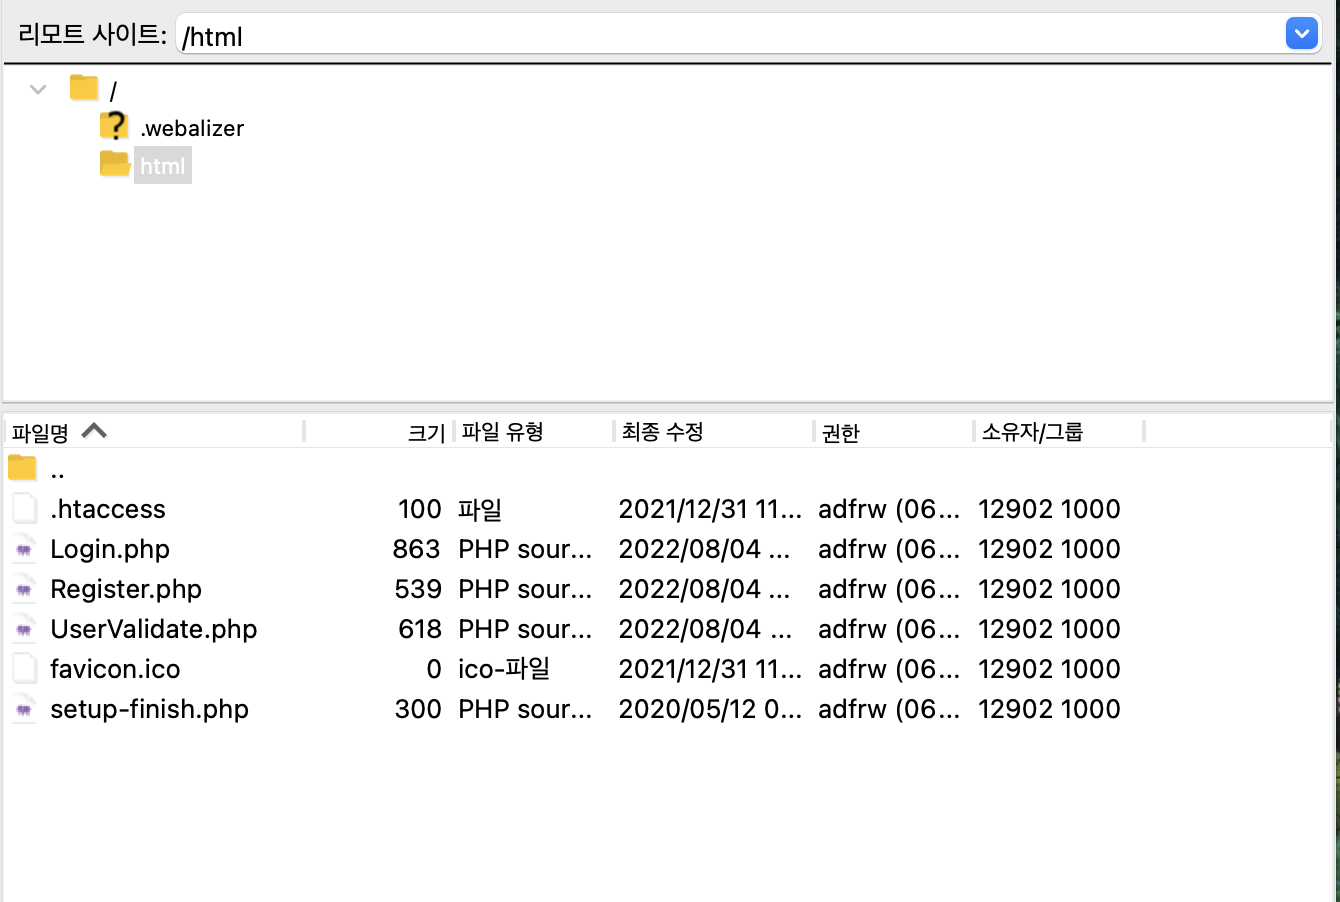
Login.php (로그인을 위한)
<?php
    $con = mysqli_connect("localhost", "자신의 아이디", "비밀번호", "자신의 아이디");
    mysqli_query($con,'SET NAMES utf8');

    $userID = $_POST["userID"];
    $userPassword = $_POST["userPassword"];
    $userName = $_POST["userName"];

    $statement = mysqli_prepare($con, "INSERT INTO USER VALUES (?,?,?)");
    mysqli_stmt_bind_param($statement, "sss", $userID, $userPassword, $userName);
    mysqli_stmt_execute($statement);


    $response = array();
    $response["success"] = true;


    echo json_encode($response);


?>
Register.php (회원 가입을 위한)
<?php
    $con = mysqli_connect("localhost", "자신의 아이디", "비밀번호!", "자신의 아이디");
    mysqli_query($con,'SET NAMES utf8');

    $userID = $_POST["userID"];
    $userPassword = $_POST["userPassword"];
    $userName = $_POST["userName"];

    $statement = mysqli_prepare($con, "INSERT INTO USER VALUES (?,?,?)");
    mysqli_stmt_bind_param($statement, "sss", $userID, $userPassword, $userName);
    mysqli_stmt_execute($statement);


    $response = array();
    $response["success"] = true;


    echo json_encode($response);


?>
UserValidate.php(아이디 중복체크를 위한)
<?php
    $con = mysqli_connect("localhost", "자신의 아이디", "자신의 비밀번호", "자신의 아이디");

    $userID = $_POST["userID"];

    $statement = mysqli_prepare($con, "SELECT userID FROM USER WHERE userID = ?");
    mysqli_stmt_bind_param($statement, "s", $userID);
    mysqli_stmt_execute($statement);
    mysqli_stmt_store_result($statement);
    mysqli_stmt_bind_result($statement, $userID);


    $response = array();
    $response["success"] = true;

    while(mysqli_stmt_fetch($statement)){
        $response["success"]=false;
        $response["userID"]=$userID;
    }

    echo json_encode($response);


?>
인제 Kotlin 코드만 작성하면 끝입니다.
우선 아래와 같이 두개의 Activity를 만들어 준 후 코드를 작성합니다.
LoginActivity.kt
import android.content.Intent
import android.os.Bundle
import android.view.View
import android.widget.Toast
import androidx.appcompat.app.AppCompatActivity
import com.android.volley.Response
import com.android.volley.toolbox.Volley
import org.hango.com.MainActivity
import org.hango.com.databinding.ActivityLoginBinding
import org.json.JSONException
import org.json.JSONObject


class LoginActivity : AppCompatActivity() {

    override fun onCreate(savedInstanceState: Bundle?) {
        val binding = ActivityLoginBinding.inflate(layoutInflater)
        super.onCreate(savedInstanceState)
        setContentView(binding.root)

        binding.btnRegister.setOnClickListener(
            View.OnClickListener
            //회원가입 버튼을 클릭시 수행
            {
                val intent = Intent(this@LoginActivity, RegisterActivity::class.java)
                startActivity(intent)
            })

        binding.btnLogin.setOnClickListener(View.OnClickListener {
            val userID = binding.etId.getText().toString()
            val userPass = binding.etPass.getText().toString()
            val responseListener =
                Response.Listener<String?> { response ->
                    try {
                        val jasonObject = JSONObject(response)
                        val success = jasonObject.getBoolean("success")
                        if (success) { //회원등록 성공한 경우
                            val userID = jasonObject.getString("userID")
                            val userPass = jasonObject.getString("userPassword")
                            Toast.makeText(applicationContext, "로그인 성공", Toast.LENGTH_SHORT).show()
                            val intent = Intent(this@LoginActivity, MainActivity::class.java)
                            intent.putExtra("log", "User")
                            intent.putExtra("userID", userID)
                            startActivity(intent)
                        } else { //회원등록 실패한 경우
                            Toast.makeText(applicationContext, "로그인 실패", Toast.LENGTH_SHORT).show()
                            return@Listener
                        }
                    } catch (e: JSONException) {
                        e.printStackTrace()
                    }
                }

            val errorListener = Response.ErrorListener {
                Toast.makeText(applicationContext, "회원가입 처리시 에러발생!", Toast.LENGTH_SHORT).show()
                return@ErrorListener
            }
            val loginRequest = LoginRequest(userID, userPass, responseListener)
            val queue = Volley.newRequestQueue(this@LoginActivity)
            queue.add(loginRequest)
        })
    }
}
RegisterActivity.kt
import RegisterRequest
import ValidateRequest
import android.content.Intent
import android.os.Bundle
import android.util.Log
import android.view.View
import android.widget.Toast
import androidx.appcompat.app.AlertDialog
import androidx.appcompat.app.AppCompatActivity
import com.android.volley.Response
import com.android.volley.toolbox.Volley
import org.hango.com.databinding.ActivityRegisterBinding
import org.json.JSONException
import org.json.JSONObject


class RegisterActivity : AppCompatActivity() {
    private var dialog: AlertDialog? = null
    private var validate = false


    override fun onCreate(savedInstanceState: Bundle?) {
        val binding = ActivityRegisterBinding.inflate(layoutInflater)
        super.onCreate(savedInstanceState)
        setContentView(binding.root)

        binding.validateButton.setOnClickListener(
            View.OnClickListener
            //id중복체크
            {
                val userID = binding.etId.getText().toString()
                if (validate) {
                    return@OnClickListener
                }
                if (userID == "") {
                    val builder = AlertDialog.Builder(this@RegisterActivity)
                    dialog = builder.setMessage("아이디는 빈 칸일 수 없습니다")
                        .setPositiveButton("확인", null)
                        .create()
                    dialog!!.show()
                    return@OnClickListener
                }
                val responseListener =
                    Response.Listener<String?> { response ->
                        try {
                            val jsonResponse = JSONObject(response)
                            val success = jsonResponse.getBoolean("success")
                            if (success) {
                                val builder = AlertDialog.Builder(this@RegisterActivity)
                                dialog = builder.setMessage("사용할 수 있는 아이디입니다.")
                                    .setPositiveButton("확인", null)
                                    .create()
                                dialog!!.show()
                                binding.etId.setEnabled(false)
                                validate = true
                                binding.validateButton.setText("확인")
                            } else {
                                val builder = AlertDialog.Builder(this@RegisterActivity)
                                dialog = builder.setMessage("사용할 수 없는 아이디입니다.")
                                    .setNegativeButton("확인", null)
                                    .create()
                                dialog!!.show()
                            }
                        } catch (e: JSONException) {
                            e.printStackTrace()
                        }
                    }
                val error = Response.ErrorListener { error ->
                    Log.d("ERROR", "서버 Response 가져오기 실패: $error")}
                val validateRequest = ValidateRequest(userID, responseListener,error)
                val queue = Volley.newRequestQueue(this@RegisterActivity)
                queue.add(validateRequest)
            })

        binding.btnRegister.setOnClickListener(View.OnClickListener { //editText에 입력되어있는 값을 get(가져온다)해온다
            val userID = binding.etId.getText().toString()
            val userPass = binding.etPass.getText().toString()
            val userName = binding.etName.getText().toString()
            val PassCk = binding.etPassck.getText().toString()
            val responseListener =
                Response.Listener<String?> { response ->

                    //volley
                    try {
                        val jasonObject = JSONObject(response) //Register2 php에 response
                        val success = jasonObject.getBoolean("success") //Register2 php에 sucess
                        if (userPass == PassCk) {
                            if (success) { //회원등록 성공한 경우
                                Toast.makeText(applicationContext, "회원 등록 성공", Toast.LENGTH_SHORT)
                                    .show()
                                val intent = Intent(
                                    this@RegisterActivity,
                                    LoginActivity::class.java
                                )
                                startActivity(intent)
                            }
                        } else { //회원등록 실패한 경우
                            Toast.makeText(applicationContext, "회원 등록 실패", Toast.LENGTH_SHORT)
                                .show()
                            return@Listener
                        }
                    } catch (e: JSONException) {
                        e.printStackTrace()
                    }
                }
            //서버로 volley를 이용해서 요청을 함
            val registerRequest = RegisterRequest(
                userID,
                userPass,
                userName,
                responseListener
            )
            val queue = Volley.newRequestQueue(this@RegisterActivity)
            queue.add(registerRequest)
        })
    }
}
Volley로 인터넷 통신 코드를 작성해 줍니다.
LoginRequest.kt
import com.android.volley.AuthFailureError
import com.android.volley.Response
import com.android.volley.toolbox.StringRequest


class LoginRequest(userID: String, userPassword: String, listener: Response.Listener<String?>?) :
    StringRequest(Method.POST, URL, listener, null) {
    private val map: MutableMap<String, String>

    @Throws(AuthFailureError::class)
    override fun getParams(): Map<String, String>? {
        return map
    }

    companion object {
        //서버 url 설정(php파일 연동)
        private const val URL = "http://casio2978.dothome.co.kr/Login.php"
    }

    init {
        map = HashMap()
        map["userID"] = userID
        map["userPassword"] = userPassword
    }
}
RegisterReqeust.kt
import com.android.volley.AuthFailureError
import com.android.volley.Response
import com.android.volley.toolbox.StringRequest

class RegisterRequest(
    userID: String,
    userPassword: String,
    userName: String,
    listener: Response.Listener<String?>?
) :
    StringRequest(Method.POST, URL, listener, null) {
    private val map: MutableMap<String, String>

    @Throws(AuthFailureError::class)
    override fun getParams(): Map<String, String>? {
        return map
    }

    companion object {
        //서버 url 설정(php파일 연동)
        private const val URL = "http://casio2978.dothome.co.kr/Register.php"
    }

    init {
        map = HashMap()
        map["userID"] = userID
        map["userPassword"] = userPassword
        map["userName"] = userName
    }
}
ValidateRequest.kt
import com.android.volley.AuthFailureError
import com.android.volley.Response
import com.android.volley.toolbox.StringRequest

class ValidateRequest(userID: String, listener: Response.Listener<String?>?, error: Response.ErrorListener) :
    StringRequest(Method.POST, URL, listener, error) {
    private val map: MutableMap<String, String>

    @Throws(AuthFailureError::class)
    override fun getParams(): Map<String, String>? {
        return map
    }

    companion object {
        //서버 url 설정(php파일 연동)
        private const val URL = "http://casio2978.dothome.co.kr/UserValidate.php"
    }

    init {
        map = HashMap()
        map["userID"] = userID
    }
}
인제 앱을 켰을 때 로그인창이 먼저 나타나도록,
AnroidManifest.xml에서 LoginActivity에 아래와 같이 intent-filter 태그를 작성해 주면 끝납니다.
<activity
    android:name=".login.LoginActivity"
    android:exported="true" >
  <intent-filter>
    <action android:name="android.intent.action.MAIN" />

    <category android:name="android.intent.category.LAUNCHER" />
    </intent-filter>